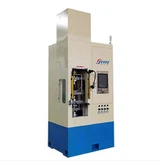
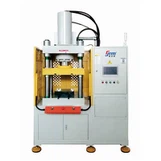
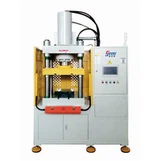
Hey there! As a supplier of 20 Ton Benchtop Presses, I often get asked about how to calibrate these machines. Calibration is super important as it ensures that your press is working accurately and safely. In this blog post, I'm gonna walk you through the steps to calibrate a 20 Ton Benchtop Press.
Why Calibration Matters
Before we dive into the calibration process, let's talk about why it's so crucial. A well - calibrated press guarantees consistent results. Whether you're using it for metal forming, stamping, or any other application, accuracy is key. If your press isn't calibrated correctly, you might end up with products that don't meet the required specifications, which can lead to wasted materials and time. Plus, an uncalibrated press can be a safety hazard. Over - or under - applying pressure can cause the press to malfunction, potentially injuring the operator.
Tools You'll Need
To calibrate your 20 Ton Benchtop Press, you'll need a few tools:
- A reliable pressure gauge: This will help you measure the actual pressure being applied by the press.
- A set of precision weights: These are used to verify the press's capacity.
- A torque wrench: For tightening bolts and ensuring proper alignment.
- A feeler gauge: To check the clearance between different parts of the press.
Step 1: Visual Inspection
The first step in calibration is a thorough visual inspection. Look for any signs of wear and tear, such as cracks in the frame, loose bolts, or leaks in the hydraulic system. If you notice any issues, it's best to address them before proceeding with the calibration. Check the hydraulic hoses for any signs of damage or leaks. A leaky hose can cause a drop in pressure and affect the accuracy of the press. Also, make sure all the moving parts are well - lubricated.


Step 2: Zeroing the Pressure Gauge
Start by zeroing the pressure gauge. This is important because it sets a baseline for accurate pressure measurements. To do this, make sure the press is in the fully retracted position. Then, adjust the pressure gauge to read zero. If your gauge has a manual adjustment screw, turn it until the needle points to zero. Some modern gauges may have an electronic zero - setting function, so refer to the manufacturer's instructions for those.
Step 3: Applying Known Weights
Next, it's time to apply known weights to the press. Place the precision weights on the press's ram in a balanced manner. Start with a small weight and gradually increase it. As you add weights, observe the pressure gauge reading. Compare the gauge reading with the expected pressure based on the weight you've applied. The formula for calculating pressure is Pressure = Force / Area. In this case, the force is the weight of the weights, and the area is the surface area of the ram.
For example, if you're using a weight of 1000 pounds and the ram has a surface area of 10 square inches, the expected pressure would be 1000 / 10 = 100 psi. If the gauge reading is significantly different from the expected value, you'll need to make adjustments.
Step 4: Adjusting the Pressure Relief Valve
The pressure relief valve is a crucial component of the press. It's designed to prevent the press from exceeding its maximum capacity. If the pressure gauge readings are off, you may need to adjust the pressure relief valve. This should be done carefully, as an incorrect adjustment can lead to over - or under - pressurization.
To adjust the valve, first, refer to the press's manual for the correct procedure. Usually, you'll need to use a torque wrench to loosen or tighten a locking nut on the valve. Then, turn the adjustment screw clockwise to increase the pressure or counter - clockwise to decrease it. Make small adjustments and re - check the pressure gauge after each adjustment.
Step 5: Checking the Ram Alignment
Proper ram alignment is essential for accurate pressing. Use a feeler gauge to check the clearance between the ram and the frame. The clearance should be uniform around the entire circumference of the ram. If the clearance is uneven, it can cause the press to apply pressure unevenly, leading to inaccurate results.
To adjust the ram alignment, you may need to loosen the bolts that hold the ram in place and make small adjustments. Use a torque wrench to tighten the bolts back to the specified torque. Re - check the alignment with the feeler gauge after making the adjustments.
Step 6: Testing the Press
Once you've made all the necessary adjustments, it's time to test the press. Run a few test cycles with different loads to ensure that the press is working accurately. Pay close attention to the pressure gauge readings and the quality of the work being done. If everything looks good, your press is now calibrated.
Related Products
If you're interested in other types of hydraulic presses, we also offer Air Operated Hydraulic Press, Jet Hydraulic Press, and Precision Hydraulic Press. These presses are designed for different applications and offer high - quality performance.
Contact for Purchase
If you're in the market for a 20 Ton Benchtop Press or any of our other products, we'd love to hear from you. Contact us to discuss your specific requirements and get a quote. Our team of experts is always ready to assist you in finding the right press for your needs.
References
- Hydraulic Press Handbook: A comprehensive guide to the operation and maintenance of hydraulic presses.
- Manufacturer's Manual: The manual that came with your 20 Ton Benchtop Press provides detailed information about calibration and maintenance.