Hey there! As a supplier of 30 Ton Presses, I often get asked about how to install dies on these machines. It's a crucial step that can greatly impact the performance and longevity of your press, so I'm here to break it down for you in a simple, easy - to - follow way.
Understanding Your 30 Ton Press
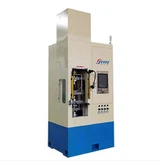
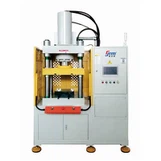
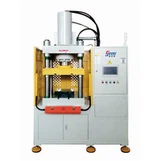
First things first, let's talk a bit about the 30 Ton Press itself. This is a powerful machine designed to handle a variety of pressing tasks, from metal stamping to forging. The "30 Ton" refers to the maximum force that the press can exert, which gives you an idea of its capabilities.


If you're in the market for a press and not sure if a 30 Ton Press is right for you, you might also want to check out our Precision Hydraulic Press or 20 Ton Hydraulic Press. These options offer different force capacities and features that could better suit your specific needs.
Pre - Installation Checks
Before you even think about installing the dies, there are a few checks you need to do. Start by inspecting the press itself. Look for any signs of damage, like cracks in the frame or leaks in the hydraulic system. Make sure all the moving parts are clean and well - lubricated. You don't want any dirt or debris getting in the way during the die installation or the pressing operation.
Next, examine the dies. Check for any chips, cracks, or wear on the cutting edges or forming surfaces. If the dies are damaged, they won't work properly and could even cause damage to the press. It's also a good idea to measure the dies to ensure they are the correct size for your 30 Ton Press.
Tools You'll Need
To install the dies on your 30 Ton Press, you'll need a few basic tools. A set of wrenches is a must - have. You'll use these to loosen and tighten the bolts that hold the dies in place. A mallet can also come in handy for gently tapping the dies into position. And don't forget a measuring tape or caliper to make sure everything is aligned correctly.
Installing the Upper Die
Let's start with the upper die. First, make sure the press is turned off and the ram is in the up position. This will give you plenty of space to work. Carefully lift the upper die and place it on the ram. Align the holes in the die with the holes in the ram. You might need to use a drift pin to get them lined up perfectly.
Once the holes are aligned, insert the bolts through the holes and start tightening them with a wrench. Don't tighten them all the way just yet. You'll want to make some final adjustments before fully securing the die.
Installing the Lower Die
Now, let's move on to the lower die. Place the lower die on the bolster plate of the press. The bolster plate is the flat surface at the bottom of the press where the lower die sits. Again, align the holes in the die with the holes in the bolster plate.
Insert the bolts and start tightening them, but like with the upper die, don't tighten them completely. You'll need to make sure the upper and lower dies are properly aligned before finalizing the installation.
Aligning the Dies
Alignment is crucial for the proper functioning of the press. To align the dies, lower the ram slowly until the upper die almost touches the lower die. Use a piece of paper or a feeler gauge to check the gap between the two dies. The gap should be even all around.
If the gap is uneven, you'll need to make some adjustments. You can do this by loosening the bolts on the die that needs adjustment and gently tapping it into the correct position with a mallet. Keep checking the gap until it's even.
Final Tightening
Once the dies are properly aligned, it's time to finalize the installation. Go back and tighten all the bolts on both the upper and lower dies using a wrench. Make sure they are tightened securely, but don't over - tighten them as this could damage the dies or the press.
Testing the Press
After installing the dies, it's important to test the press. Start the press and run it through a few cycles at a slow speed. Watch for any signs of misalignment or unusual noise. If everything looks and sounds good, you can gradually increase the speed and start using the press for your normal operations.
Maintenance Tips
To keep your 30 Ton Press and the dies in good condition, regular maintenance is key. After each use, clean the dies and the press to remove any debris or residue. Lubricate the moving parts as recommended by the manufacturer. And periodically check the alignment of the dies to make sure they haven't shifted over time.
Safety First
Remember, working with a 30 Ton Press can be dangerous. Always wear appropriate safety gear, like safety glasses and gloves. Follow all the safety instructions in the press manual. And never try to install or adjust the dies while the press is running.
Conclusion
Installing dies on a 30 Ton Press might seem like a daunting task, but if you follow these steps, you'll be able to do it safely and effectively. Whether you're a seasoned professional or just starting out, getting the die installation right is essential for getting the most out of your press.
If you have any questions about installing dies on your 30 Ton Press or if you're interested in purchasing one of our presses, like the 20 Ton Floor Press, feel free to reach out. We're here to help you with all your pressing needs. Contact us today to start a discussion about your requirements and see how we can assist you in your operations.
References
- "Press Machine Operation and Maintenance Guide" - General Industry Handbook
- "Die Design and Installation Best Practices" - Manufacturing Technology Journal